- If you're not in edit mode already, click 'Edit' at the top right of the page.

- Hover your mouse above or below an existing web part or under the title region and click the plus sign and then select the FAQ web part.


- If you want to add a title to your web part to be displayed on the page, you can click into the "Web Part Title" section.
- Click on the edit pen in the top left corner of the web part to configure it.

- The details pane will then appear on the right hand side. Providing the following options:
- Create new list: If you don't already have an FAQ list to display, type in the name of your new list. List names will automatically be prefixed with "FAQ_" and then click 'Create'.

- Select List: From the dropdown, you should now see your new FAQ list you created.

- Max items per page: To control the number of items you want to display on the page.

- Allow searching?: This trigger will display a search box at the top of your FAQs so that you can search for specific content.

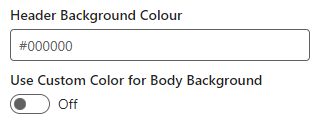
- Background Colour: You can use custom colours from an online source to customize your header and body background colour.
Instead of using a custom colour, you can click on the colour pallet, and chose one of the provided colours.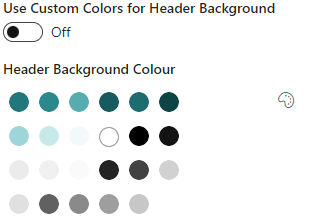
- Create new list: If you don't already have an FAQ list to display, type in the name of your new list. List names will automatically be prefixed with "FAQ_" and then click 'Create'.
Now that the web part has been configured, you will need to add some FAQs to your new list in order for anything to display. At the bottom of the page, you will see a bar with a number of options. Click on the 'New FAQ' button to create some FAQs

6. Select the list you created from the dropdown menu
7. Fill in your question and answer.
8. If you want to apply targeting to your question, you can click on the targeting button. This lets you select either a Microsoft 365 or Security group, meaning only members of that group will see this question in the FAQ.
9. Once ready, you can now click 'Create'. You will then see a success message to confirm the item has been created.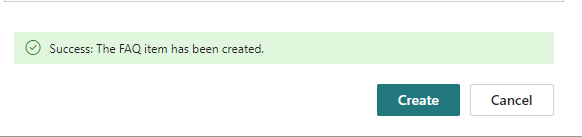
10. To save your page, click on the 'Save as draft' button in the top left corner.
11. You should now see the newly created FAQ item in your configured web part.