With Link Tiles, you're also able to control the behaviour of tiles when clicked e.g. opening on the current page, open in a new tab or bringing the link up in a Frame.
You can also link off to Power Apps or Microsoft Forms along with links to external sites and internal systems.
This webpart is part of the Percy Web Parts app which is included in the Percy site templates. If you do not see this webpart, add the Percy Web Parts app to your site.
To manage the links tiles follow these steps:
- Click 'Edit' in the top right of your Intranet

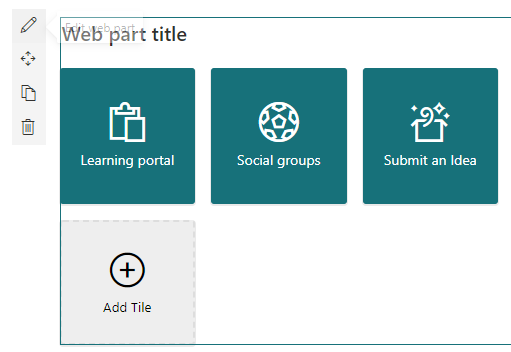
- Once you add the link tiles webpart to your page, you can click on the edit pen to apply your desired configuration.
- In the configuration panel, you will see the following options:
- Display: You have two choices between Grid or List depending on your preference. The list display is quite nice for a narrow column.
- Grid Columns: This gives you some configuration on how big the tiles are which you can adjust depending on the size of the zone your tiles are in.
- Apply Custom Branding: If you want the webpart heading styling to be applied, then make sure this is turned on.
- Show tiles labels: Sometimes you may use your own icons that include text, this toggle allows you to turn off titles for all link tiles.
- Global Position: This setting is suitable for tiles spanning the full width of the page as it adds some additional padding to the tile and reduces their size slightly.
- To add a new link tiles, click on the 'Add tile' option which brings up a form you can fill in to create your tile.

- Title name
- Description
- URL
- Background: Choose a background colour for your link by inputted the hex code or selecting the colour from the provided brand boxes.
- Text Colour: Typically set to either white "#ffffff" or black "#000000" depending on the colour of the tile.
- Media Type: Icon or Image. Either option provide a picker below, so you can either select your icon or upload your own custom image.
- Target: Do you want the tile to open in a new tab, current tab or a smaller framed window. The "Display in Modal" option is great for PowerApps & form submissions.
- User Targeting: This lets you specify a Microsoft 365 or Security group. Only members of the group will be able to see this tile:

- Save your changes and then add the tile to update the Link Tiles, you can then continue to add more.