This webpart is part of the Percy Web Parts app which is included in the Percy site templates. If you do not see this webpart, add the Percy Web Parts app to your site.
The People Finder web part acts as a directory for all your people within the organisation. It's likely that you would have a "People Directory" or "People Search" page set up with this component on it, instead of using it in multiple places.
1. If you're not in edit mode already, click 'Edit' at the top right of the page.
2. Hover your mouse above or below an existing web part or under the title region and click the plus sign and then select the People Finder web part.

3. Click on the edit pen in the top left corner of the web part to configure it.
4. The details pane will then appear on the right hand side. Providing the following options
- Search Source: if you have a custom Result Source, you can paste the ID into here to use it. Otherwise, the default SharePoint one is used.
- Try to get user Images: You can see by flicking this switch, the people search will try and find user images from the users profile. If this option is kept to "off", then the users initials will be displayed instead.
- Filters Available: If you want to let people filter by various properties, such as Department or Location, enable this
- Apply Custom Height: lets you set a vertical size limit for the webpart, great if you have lots of people but want to restrict the size of the webpart
- Use Paging for Results: when enabled, lets you set a limit for how many people are displayed, and users can flick through pages to see more results.
- Default placeholder for search box: This text will appear on your search box at the initial glance.
- Placeholder for search box on focus: Once a user has selected the search box, this is the text that will appear.
- Request Results By: switch between Last or First name
- Load Users by Default: If enabled, results will be displayed when the page loads. If disabled, people will have to interact with the webpart for results to display
- Refinders: when these are enabled, searches will also search against these properties in addition to names.
5. Save the page as a draft. You should now see the people finder working on the page.
6. By hovering over a person, you will see their index card appear with the following details:

- Send Email: To open up and new email with this user in the "to:" field
- Start Chat: Depending on what app is used for chatting, if its linked to the users Office 365 profile and more specifically their "sip" address. The relevant app will open up to start a chat.
- Call: The same applies as the above, the relevant app will open up to start a call.
- Contact: This shows the users contact details
- Files: This shows the files the user has been working on recently which you also have access to.
7. By clicking on "Show more" you will open up a more detailed view of the above items.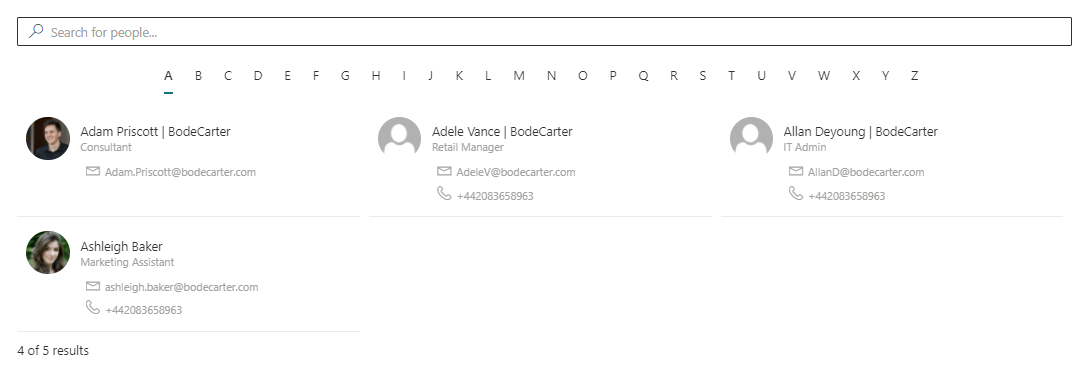
8. When you are ready for your audience to see the page, click Publish.