NOTE: In order to use this webpart, your Microsoft 365 account needs to have a mailbox / Exchange licence, otherwise you'll be unable to place bookings.
1. When you first go to the page that has this webpart, you will see a diagram with interactable areas like so: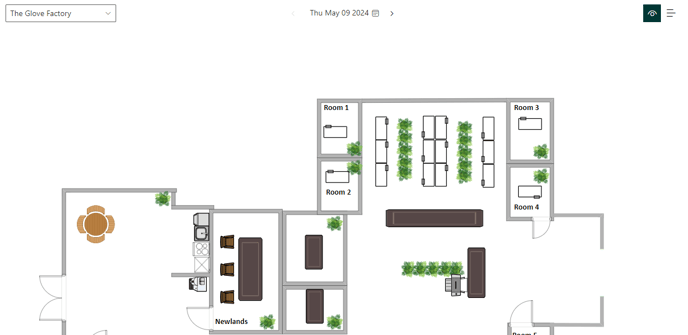
- If there are multiple diagrams available, in the top left you will see a dropdown menu where you can select the different diagrams
- Above the diagram, you can flick through different dates
- In the top right you have different view options:
- ![]() shows the diagram view
shows the diagram view
- ![]() shows a list view and the desk status
shows a list view and the desk status
In the diagram view, if you hover over a bookable room, it will darken slightly. Clicking on it will show the availability of the room for the selected date:
To create a booking, click on the space at the time you want your meeting to start. You will then see these options:
- End Date
- End Time
- Event Title: when the booking is placed, it creates a calendar appointment in the associated room mailbox. This sets the title of that calendar appointment
- Location
- Create Teams Meeting: turns the calendar appointment into a Teams meeting
- Attendees: people set here will be included on the calendar appointment
When ready, click Create to complete the booking. It will then send out a calendar appointment to the mailbox associated with the room, as well as anyone added as an attendee. You will also see a message like this to confirm the booking has been created:
The list view shows all of the available rooms in a list rather than on a diagram, and gives a high-level overview of the room's availability for the day. Select the room you want to book for, and the rest of the process is the same as above: